Building an Airsoft gun from the ground up can be a daunting task. More so when you pick up a “boneyard” project; that is to say, a second-hand gun that is broken and needs some love. If you’ve been following my socials, you’ll have seen that this year at skirmishes I’ve been running my M727 build a lot, which was originally a boneyard Classic Army M4 in need of a miracle, but is now enjoying a new lease of life. However this is Airsoft, and like any player, I’ve decided I want a new gun and last summer I really enjoyed the challenge of building something from what was essentially a pile of scrap. One year on, it’s time for a new build project.
My excuse this time is my new Milsim team, Chalk 4 (check it out in the menu section), which will be running old school kit. Of course, this doesn’t necessarily require a new gun – the team requirements aren’t specific on weapons. I do have a thing for 1980’s/90’s guns and already have the 727, an MP5SD and an MC51 which are all absolutely fine, and the two HK’s are great for urban areas or when I need something more compact. The 727 is a good all-round workhorse that I recently added a silencer to purely because it’s not-historically-correctness irritates my good best friend Bubba. It’s now actually quite a long gun and yet I’ve had no issues working through CQB areas with it, so I figured why not look to build a longer rifle just to complete the collection? And why not build it from the ground up rather than throw a few hundred pounds at a paintball shop for something new yet basic? There’s no fun in that.

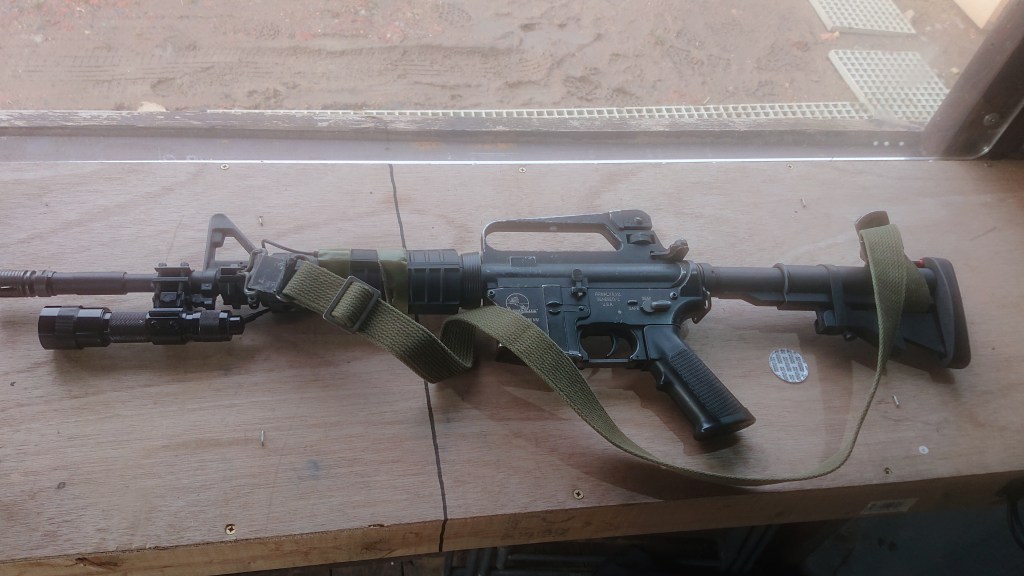
Browsing the second-hand shelves this week at Dirty Dog Airsoft, I came across this…

“Low FPS” read the label. £30. After much deliberation, I snapped it up. An ideal base, because I’ve got quite a few compatible bits in the box and I know my way around M16/M4 platforms, I just need a lower receiver to mount everything on. And I saw that it was a G&G Combat Machine – a few years ago, these were everywhere as rental guns because they were so reliable. That’s a good start. This is pretty typical of the stuff you can find on sales sites and I think it’d make for some good articles as I break it down and rebuild it.

I know, it’s been painted purple. With a brush I might add. And I’m not saying there’s anything wrong with that, but these brightly coloured parts are coming straight off and they can just go in the bin. I get that the newer generation of players are very different, with influences like Fortnite, Prime, LED lighting, Taylor Swift, Prime, coloured hair, tight trousers and AI generated media. But I grew up with Voodoo Child, the Falklands War, Desert Storm, moustaches, Bravo Two Zero, wood stoves and only three channels on TV which is a very different vibe. So this base gun is going to get stripped back and rebuilt very differently. Although clearly there are issues internally to tackle first, it needs some work externally as well to get it looking like something my Dad would have approved of.
What I want for Milsim events is something that I can use comfortably in woodland areas and will stand up to some abuse. At big events in the last few years, I’ve seen quite a few expensive builds being shown off in the safezone and again on Instagram afterwards. Usually fitted with expensive optics, thermal scopes, magnifiers, Hydra mounts, PEQ boxes etc. Yet when you get out into the field, these Crye-flaunting operators handle their weapons quite delicately as they carefully tiptoe around the action so that nothing gets damaged or dislodged. Last week, I went flying down a hill on my arse with the 727 bouncing behind, collecting twigs until hitting the bottom and rolling through a bush into a firefight. That’s what I (inadvertently) put my gear through on a normal Sunday skirmish, let alone Milsim. It needs to be cheap, basic, and ideally polymer which is much more survivable than the unfortunately brittle pot metal used in Airsoft guns. If it breaks, it shouldn’t take much to repair. I have an M4 somewhere that fell off a building once and it was fairly straightforward to fix. If you’re curious, I thought I had the weapon on a sling while resting it on a window ledge but realised too late that I’d forgotten to attach the sling the night before and left it on my desk.
I hit the bits box for any useful parts, and I found these;

A solid M16 stock (£5), an M16A2 upper (£2), and an SR-25 sling (free). My first thought then is to build an M16 because I can and it’s cool, although quite what variant will depend on what sort of handguard I can source. It’s a good option for both my US and UK loadouts, and potentially many others. UKSF used extensively the M16A1 and A2, and they would be fine but the most appealing variant is the M16A1 with M203 underslung grenade launcher.

In Airsoft, the idea of those grenades that pop and send a shotgun-like spray of plastic doesn’t appeal to me much, although it’s an added functionality. But many years ago some teammates used one for mortar rounds, which might come in handy in some situations. I’m leaning less towards a railed handguard at the moment, because they add a lot of weight and I don’t want to attach much anyway. But I’ll look into that further down the line.
This will be the first part of a series which might interest those who want to do something similar or are curious as to how Airsoft guns work. The first job will be to get the gun stripped down and see what’s inside, and whether there are signs of any dodgy tech work, and try to figure out why the gun has “low fps”. While I’m doing the internals, I’ll go shopping for external parts (handguard, outer barrel).
I’ll let you know how it goes…

I bet you would like a plain Ak74 or g3 with steel body. Costs bit more but it is just indestructible.
LikeLike