
Definitely a great find, but the £6 rig on its own isn’t much use. I needed it set up properly to hold my kit exactly where I wanted it, and then camouflaged so that it doesn’t give me away.

This is my starting point, the vest over the top of my Miltec Leaf Suit. You can see it’s been adjusted to sit more on the side of the body, but it stands out a bit.
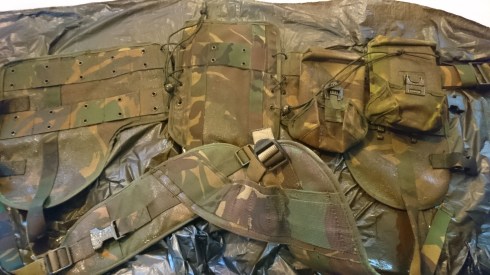
The first thing to look at is load carrying capacity. I wanted a couple of pouches, one that holds vsr mags (#1 priority in the game is keeping that rifle running), and a small utility pouch for more ammo. That’s it. No compass (never needed one in a game because I’m not traversing the alps), no books or documents, no grenades that would give a position away. Simple is going to be much quicker and more effective in the field. I didn’t have what I needed in my kit cupboard so again, I hit eBay and searched for something surplus and came across two Dutch dpm ammo pouches to match the rig for £3.

This is the right hand side of the rig as you wear it. Furthest forward, with a nice easy push clip, is the mag pouch. The Spanish clip pouch (left) isn’t as quick to access, so I’ll use that further back for ammo and things I don’t need in a hurry. I can access this away from the action when I get a moment to restock ammo.

The mag pouch is actually really useful because it has a plastic insert in the middle, which means the mags sit securely and don’t jump and rattle around when you run like their British counterparts. Four in the pouch and one in the gun will do nicely for most events (unless you miss a lot, but then there’s the reserve stored in the ammo pouch).
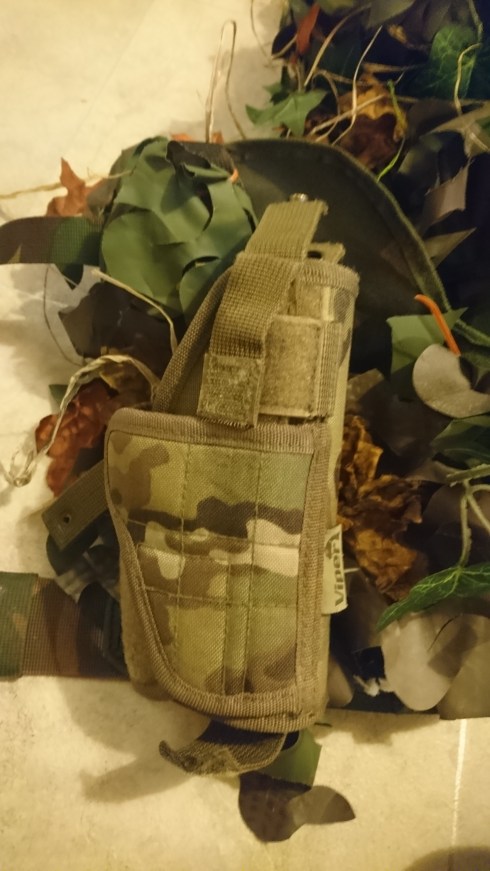
On the other side, a Viper adjustable pistol holster takes my mk23 in a crossdraw position. What I find a lot of the time while laid in position, is that my left arm supports and the right arm is free for the rifle, so it’s a lot easier to draw a pistol from the left side rather than trying to draw from the right and creating a lot more movement in doing so (try it).
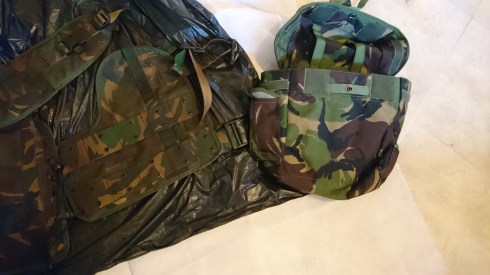
At the time, I had a Sniper Ops event to attend and needed some capacity for food and drink. For this, I added a British Army DPM respirator pouch to the back of the vest.
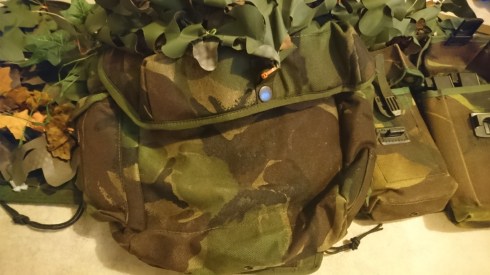

This is one of the best utility bags I’ve ever had. Rock solid build quality, and will carry a full day’s supplies and spares, plus whatever else you might need. It has two side pouches that will take smoke grenades, and an elastic loop in the lid which will keep a hat or scarf nice and secure. For the sniper ops event, I fastened it to the back of the vest using cable ties, but may reluctantly have to put it on a belt to get it to sit more comfortably. For most standard game days, I wouldn’t run it anyway. Available for less than £10 on ebay.
So that’s it for pouches. Nice, simple and organised. But it needed some work doing on the camouflage to fit the rest of the suit. The rig, like the rifle, should never be exempt from camouflage. It should be an extension of the ghillie. It is this attention to detail that makes the difference between a sniper, and a good sniper.
To dull it down, I used the same inks as in the “Crafting Leaves” article, mixed up into a little spray bottle, and sprayed on. The ink is waterproof and takes to the webbing quite well. In the photo above, you can see the difference it made. The suit is designed to be dirty and muddy looking, so this took the brightness off it and should be much less noticeable. Pay particular attention to the straps. The underside is plain and very bright.
That’s the vest with a coat of brown ink. Much better. Note I haven’t done my Multicam holster. Because I need it for other loadouts at the moment for events where I have to wear Multicam *sigh*.
But there’s more to it than that. If you have a read at the first article, “My Ghillie Build”, you’ll see how I transform some cheap camo netting into something more useful. This is going to form the base of the camouflage. The camo netting material gives a more broken, three dimensional outline and is a perfect base to glue other materials onto, or tie raffia through which also causes the netting to bunch up and form different shapes. It can be easily resprayed too depending on season or terrain.

This is the finished article. Largely because I was too involved in doing it to take photos. But I’ll expand on it. Note the exposed mag pouch on the right. The camouflage at the moment folds over the top, until I get it split up into a lid piece and the main pouch. Also, here’s the solution to the Multicam holster. Safely hidden under the netting –

With one afternoon to prep (it was a last minute find), I pulled all the previously covered techniques together. The netting was cable tied across the suit as a base. This does a lot to disguise it. On top of that, I got some crafted leaves and used a hot glue gun to attach them across the suit – the site I was at was a proper woodland site, so leaf litter was a priority. I added a some bits of artificial ivy to add some green leaves to the suit, but only in a couple of places. The last thing I want to do is look like a big mass of a plant – always look to split the body up into separate and different parts. Being October, I added a few strands of tan and brown raffia to mimic sticks and twigs onto the suit. The lighter colour raffia is great for drawing lines across the body and breaking up shapes. This was tied on using a simple overhand knot – I want this to be changeable as the seasons change. I don’t want to have to build different rigs for different seasons.
And that’s pretty much it. I figure the dirty, forest floor look is a great base to work from, and can add seasonal vegetation over the top to create more depth. I do need to spray the black buckle next time I go to work on it, and will look to add more leaves and other bits onto the netting (it’s great for attaching and tying things onto too) to build it up a bit, but I’m pleased with how it’s going so far. Let me know what you think in the comments and I hope it helps. Here’s it in conjunction with the suit –
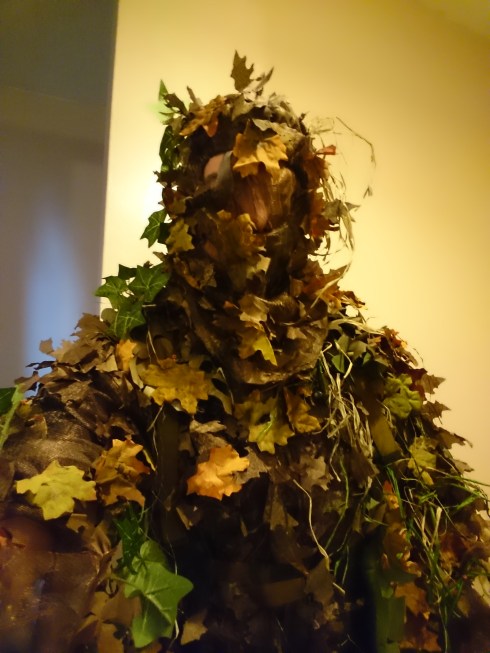
(apologies for the poor lighting. I don’t get many photos at sites. I have to work in my house)

Impressive. Thanks for sharing the info.
LikeLike