Getting the attention to detail right makes the difference between being seen, and staying unnoticed. In most woodland environments, leaves are everywhere and make a great base to add to. Unfortunately, eBay’s flower arranging section doesn’t do dirty leaf litter very well. Here’s a way round it courtesy of the guys from Sniper Ops.

Leaf suits are a brilliant base to work off. Their three dimensional form breaks up hard outlines and the colour and pattern are good, although overall a little uniform and repetitive. In the picture on the left is the Jack Pyke LLCS, on the right the MFH autumn leaf suit, which I think has a better, earthy colour.
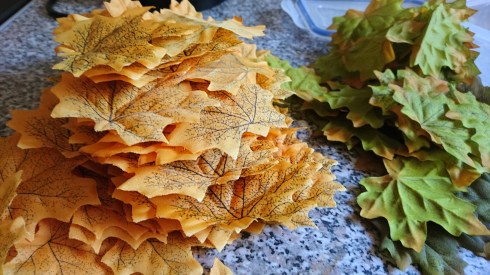
Here are the leaves. Cheap Chinese silk leaves, in bright bold colours, ideal for arts and crafts and weddings. But that’s not what I ordered them for. They’re pressed into a slightly 3D shape, lightweight and easy to dye. No way they’d be going on the suit as they are though because they’d stand out a mile off. I need to change the appearance a bit otherwise I’ll end up with a flat, uniform pattern. I’ve picked the lighter colours because they’ll take colours better; easier to dye something light a darker colour than to try and dye a dark colour lighter. Before I started, I tried boiling the leaves in vinegar for an hour to soften them up, but it wasn’t too effective.
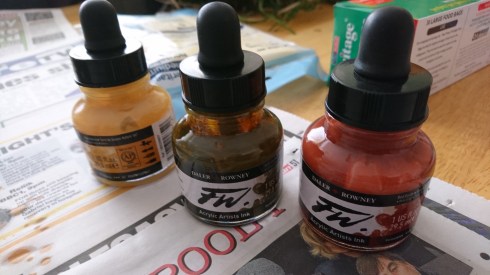
Ink of choice. Found in the local Hobbycraft, it’s a waterproof acrylic ink. I picked a dark brown, reddish brown and some kind of tan colour.
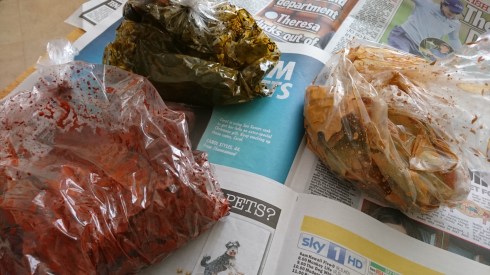
Next, put the ink (about one third of the jar) into a food bag with a bit of water (3:1 ink:water split), add a few leaves in and tie the bag tightly. Shake it up and leave for 20 minutes. I did a bag of each colour, then a few bags of mixed colours. You don’t need fifty shades of brown, but six or seven gives a bit of variety.
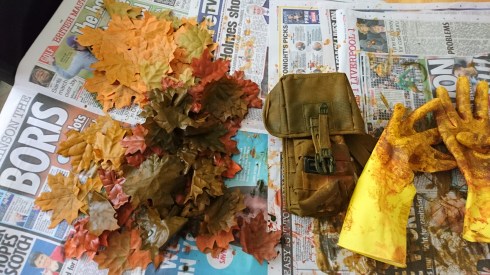
Messy stuff. I tried the ink on webbing too, as an experiment, and it takes quite well. This used to be a desert dpm ammo pouch.

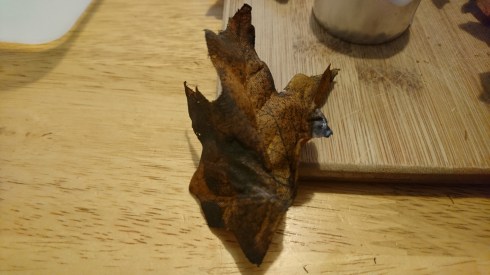
In order to speed things up, I put the wet leaves in the oven on a low heat and with the door open to dry them out. This may be the reason why they’re still a little crispy, but leaves in the environment are crispy anyway so I’ll just have to deal with it. Also, the webbing just burned. Shouldn’t have rushed the drying but I was short on time.

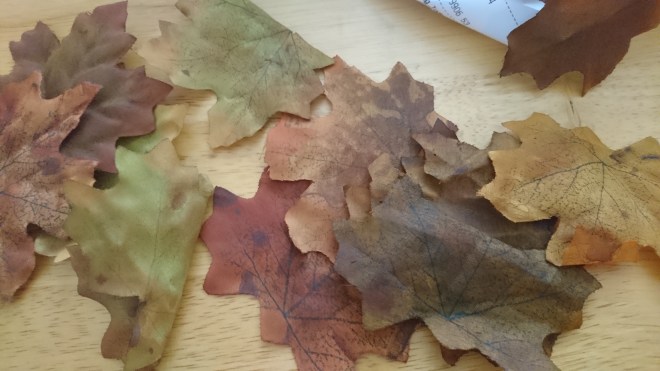
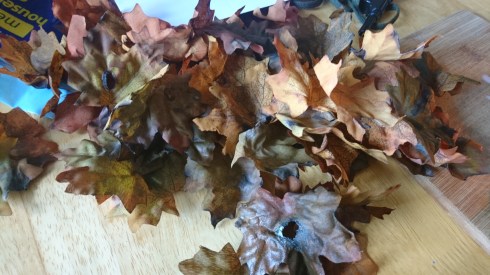
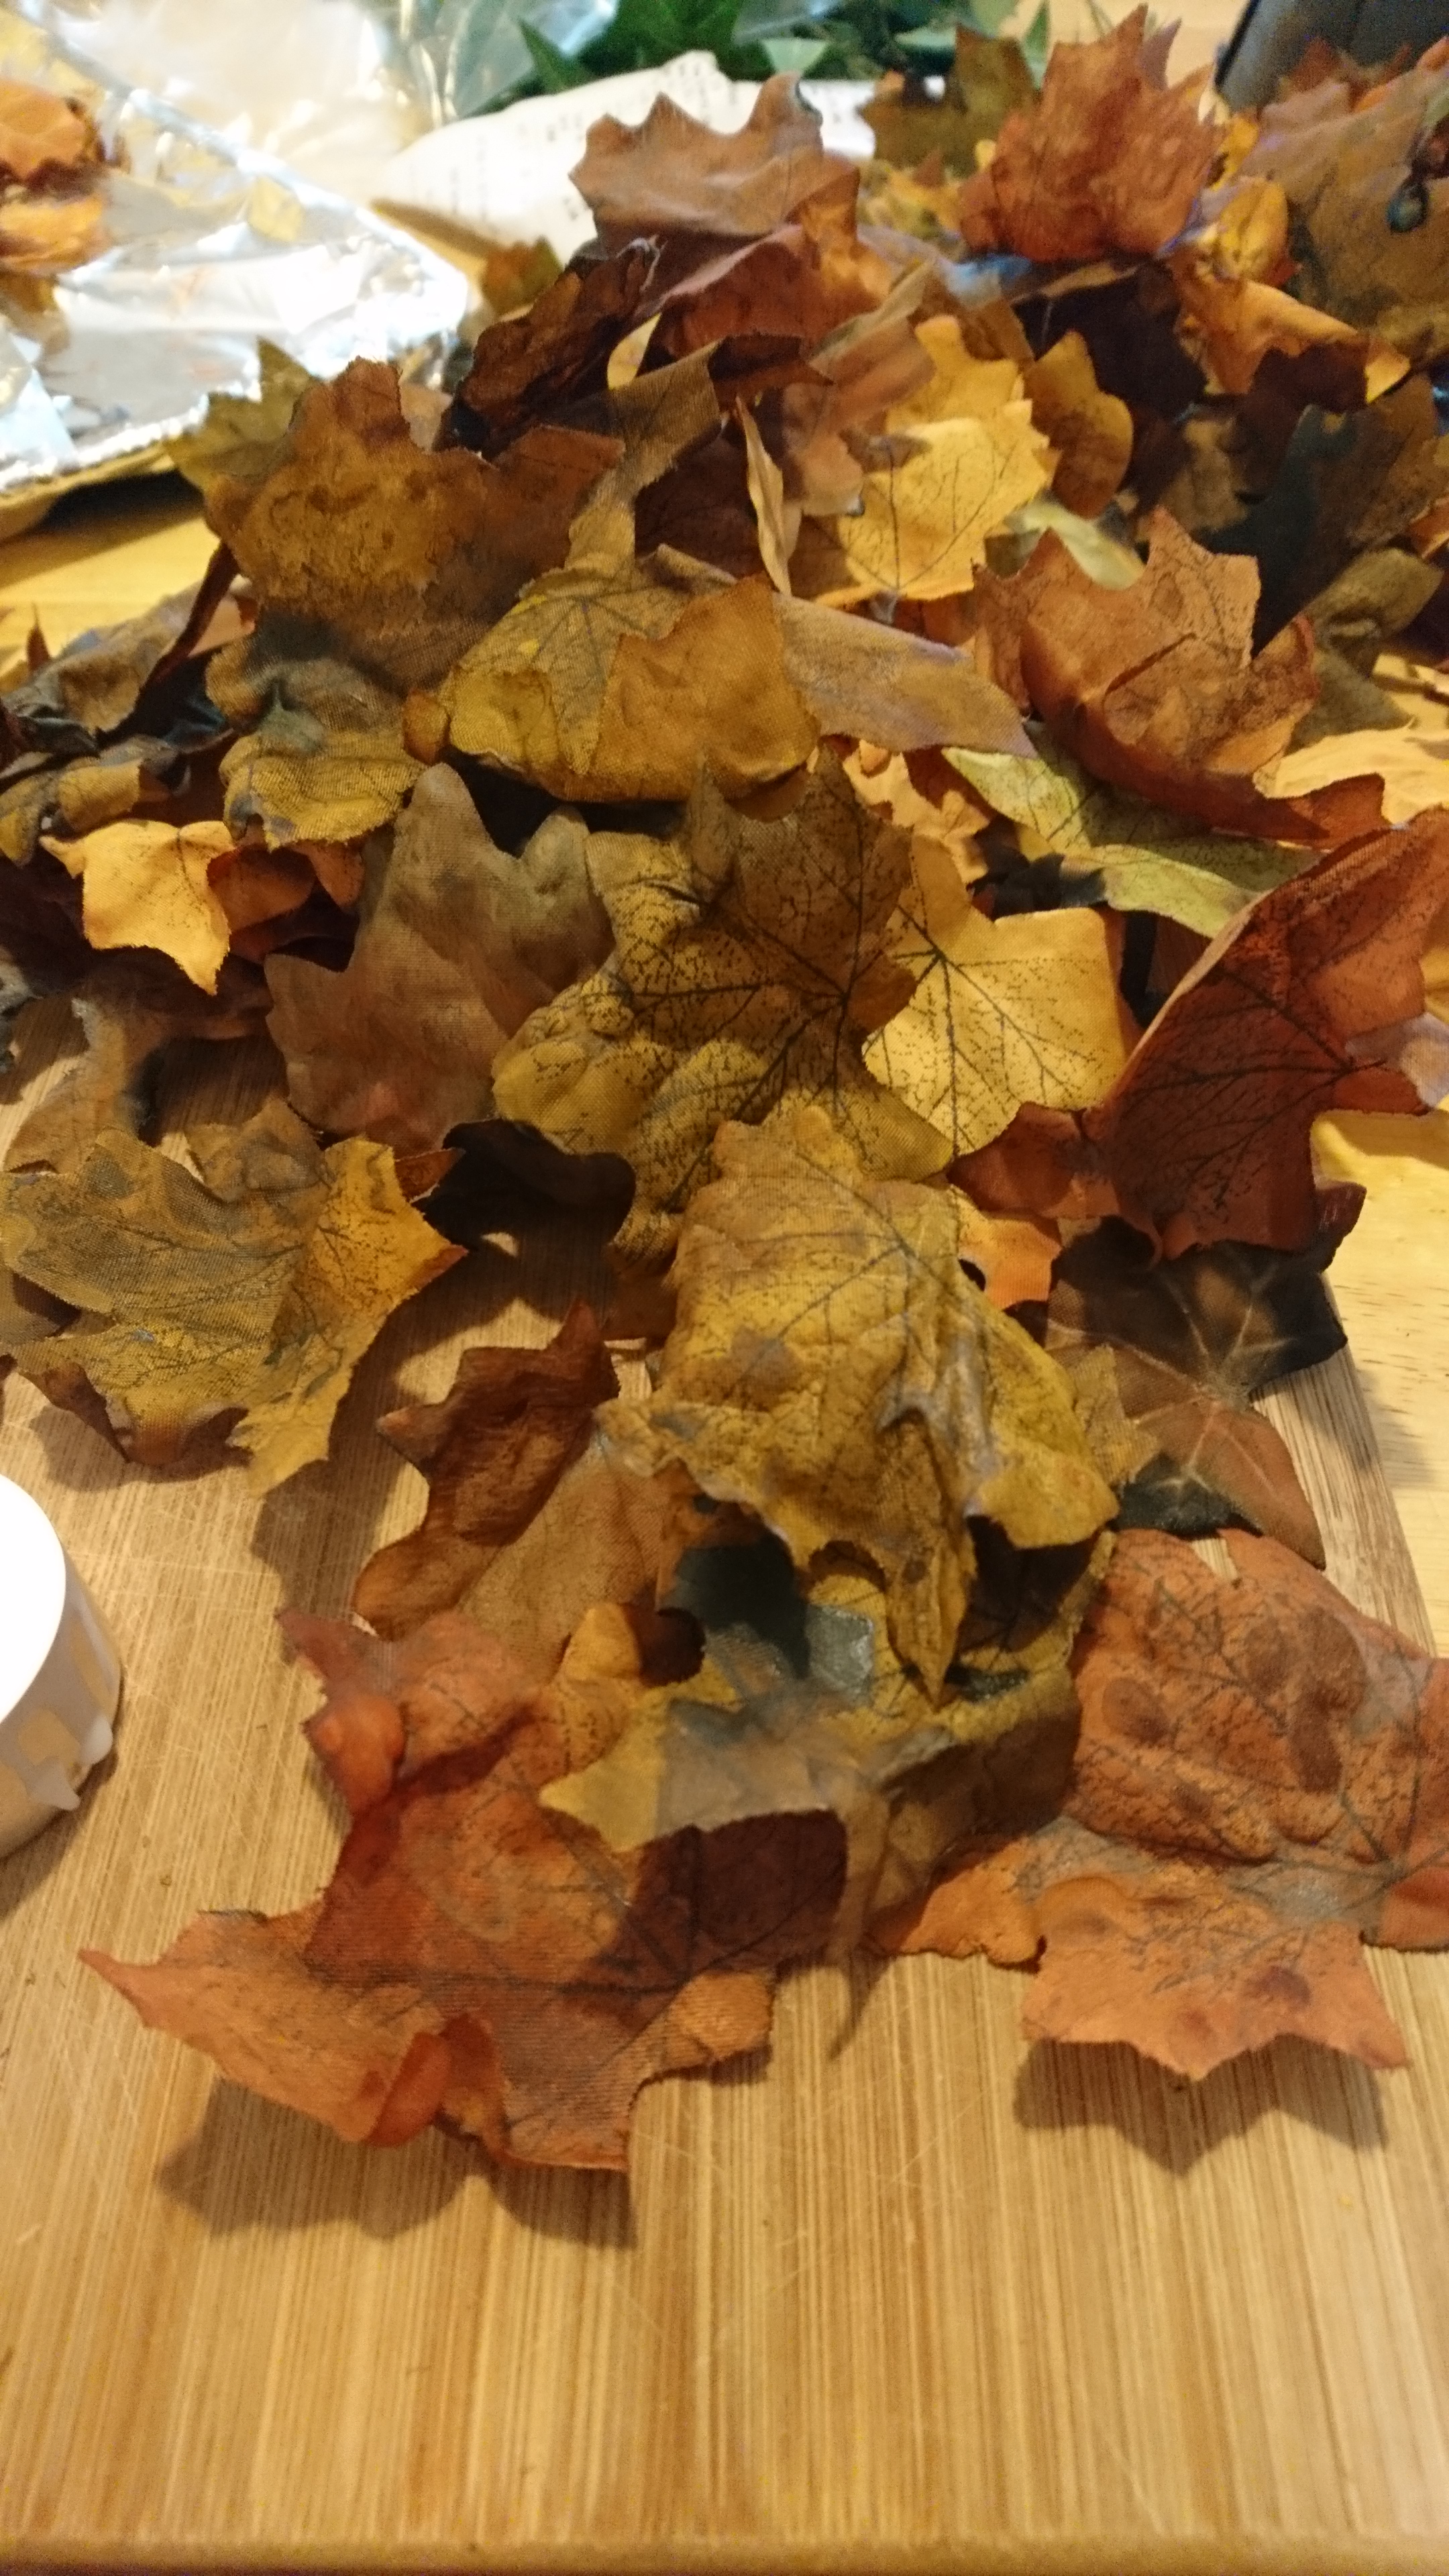
Here’s the (almost) finished product. I’m pleased with the colours and variations, and by doing them in a bag some have come out a bit blotchy, which is perfect for that dirty look.
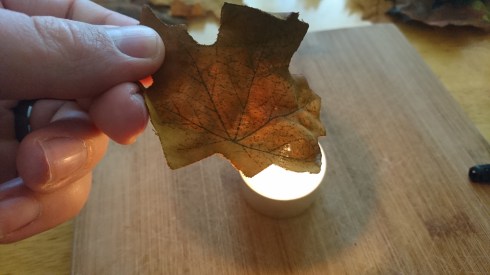
Last step in the process was to light a candle, put on some relaxing music, and start burning the leaves. Either burning holes through, burning the edges, or using the heat to cause the leaves to crumple up and twist into different shapes. This gives them a much more natural and weathered look, and melts into more 3D shapes giving more depth when attached to the suit or kit, casting shadows and breaking up shapes.

The boiling process did not add much i read.
But did you tey something else of just go allong?
Cheers
Jeroen
LikeLike
throw them in a bag (mesh or pillow case) and wash them with fabric softener and a pair of shoes. it will soften them up.
LikeLike
Hello! Thank you for this guide, I’d like to craft my own leaves too. Could you please tell me color code used for this project?
LikeLike
Hi, I’m not sure about colour codes to be honest. I picked antelope brown and burnt umber, but any combination of browns should be fine. Using different browns means you can easily mix your own shades as you need them.
LikeLike
Your blend is exactly what I need here in the Ozark’s of Arkansas USA, what would you charge me for an amount to thatch an entire ghillie? Go easy on me, I’m a disabled Marine veteran on a fixed income, thanks brother!
LikeLike
Hi Maurice,
Unfortunately I don’t do commission work, it does cost a bit doing small quantities and I’m just not set up to do it cheaply enough to keep the cost down, or to do enough of them. However I do know a few people who do make superb coloured leaves and can point you to them if you drop me a pm on Instagram or fb. Failing that, it’s not too difficult following the guide above if you have an afternoon free
LikeLike
Wow you did really great work thanks for the tips they’re excellent, about the ones you did multiple colors did you put them in one bag then let them dry then put them in another bag or how did you add the second or third color just on small sections of the leaves with out covering up the first color you put on completely ? Thanks again
LikeLike
Thanks, I had a pack of plastic food bags and just put different quantities of different inks in each to get a range of colours. The effect of multiple colours on each leaf is purely because the ink doesn’t cover each leaf evenly, and creates a messy blotchy effect.
LikeLike
Does this method work with light green inks, and how do you attach these leaves to a suit?
LikeLike
Hi Wasp,
I haven’t tried it with any greens, used it more to replicate dead leaves on the ground, but it should take the ink the same way.
Easiest ways to attach are zip ties, poked through the base fabric, or shoe goo for a more permanent fixing.
LikeLike